[Solved] How to deploy php app to heroku from windows
I am fulltime linux user and parttime windows user. Lately I have started working with windows for some project stuffs. I found windows quite frustating and limited to what linux provided me. Well it’s all personal feelings. I always hated unnecessary installations of extra applications for the same tools which most of the linux distributions provides us out of the box. For e.g. ssh-keygen. To emulate the most of the linux command we need to install cygwin.
I was working on a facebook application and had to deploy it to heroku. I could do this with few commands in ubuntu which already come with those commands preinstalled. I had to do nothing, just push and push as I had already added my SSH keys in heroku settings.
Basic walkthrough on how one can deploy the heroku app using git Bash shell.
To carry out this process you must have git bash shell installed. Download git for windows and install it.
Git Download Link
Download Heroku toolbelt for windows, Download Link for Heorku
Once downloaded install the heroku toolbelt. After installation is complete, you can set heroku path to the environment variable.
c:\\set path=%path%;C:\\Program Files (x86)\\Heroku\\bin;
Now start the Git bash shell.
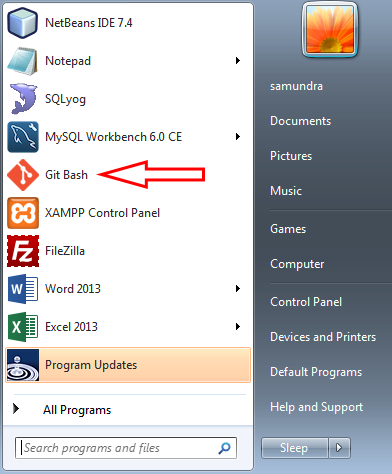
Note:We installed git bash shell because it already comes with ssh-keygen which is required to generate pair of our keys.
- Generate SSH Keys for windows
$ ssh-keygen -t rsa
When asked for
Enter file to which to save the key(/c/Users/user/.ssh/id_rsa):
just hit enter then enter your password, re-enter your password.See the screenshot below:
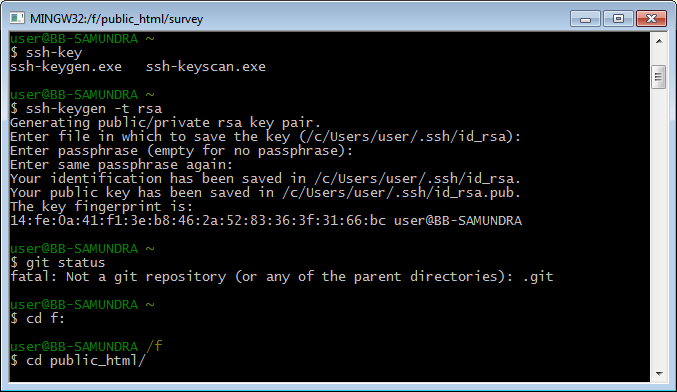
You have successfully generated ssh keys and has been saved in location supplied above.
Now, you have to use those SSH keys with heroku. To do this first copy the contents of id_rsa.pub file exactly as it is. You will find this file in C:\Users\user\.ssh\, if you haven’t changed the default folder location while creating ssh keys shown above.
Now, Go to your heroku dashboard, scroll down under section SSH Keys, Click in Add new SSH Key, paste contents of id_rsa.pub here. Then click in Add key. You have successfully added your public key to heroku. Now is the time to test our key.
Also see the screenshot below:

Upload ssh keys to heroku
$ heroku keys:add
Try to login to heroku use the command shown below, Since we have already added heroku to path. This should work.
$ heroku login
See the screenshot below:

If we are using heroku login for the first time, it looks for ssh keys and since we have already created SSH keys and have also added it to heroku, this should work as expected and give us authentication successfull message. That’s it.
- Add heroku remote repository to the project
$ heroku git:remote -a survey2email-sam
See screenshot below:
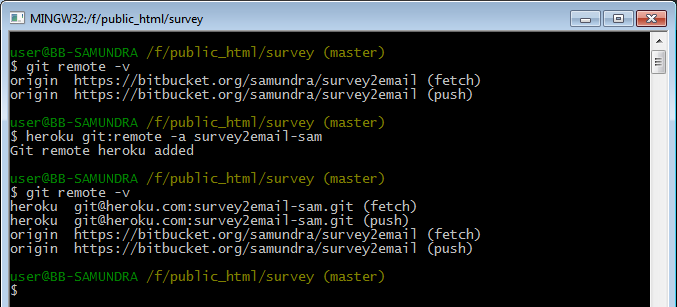
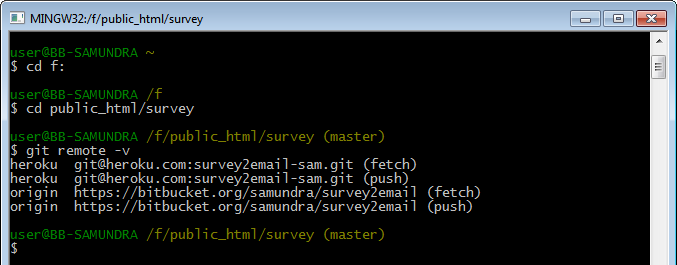
- After adding heroku remote confirm it. To confirm it use the following command.
$ git remote -v
- Now push code commits
$ git push heroku master
Enter password that you used to create SSH Key pairs. Wait for a while, heroku is working on your requesting.
After few seconds/minutes depending on your sources you will be shown feedback what is going on. Now you can feel relaxed and have cup of tea.
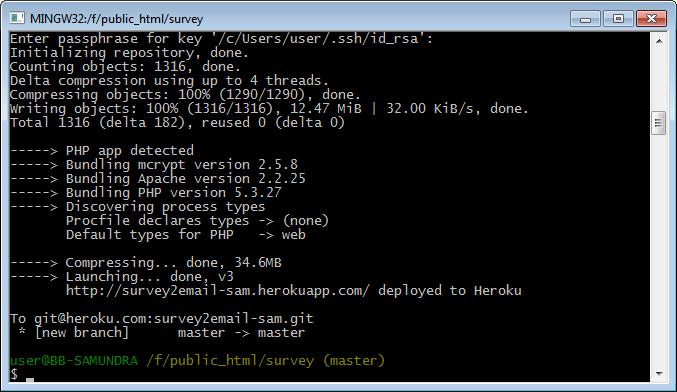
Congratulations. You have successfully deployed your PHP app to heroku.
I have skipped some steps assuming that you have basic familiarity with git. The above command assumes that you have already added, commited your codes to repository and want to deploy them to heroku.
If you find any difficulty in following the walkthrough drop your questions in comment box below.